| View previous topic :: View next topic |
| Author |
Message |
SuperKC
Expert Vidder

Joined: 24 Feb 2005
Posts: 3667
Location: On a Stick
|
 Posted: Mon Jun 11, 2007 5:19 am Post subject: Vegas Pictoral Color Guide (Not definitative, informative.) Posted: Mon Jun 11, 2007 5:19 am Post subject: Vegas Pictoral Color Guide (Not definitative, informative.) |
 |
|
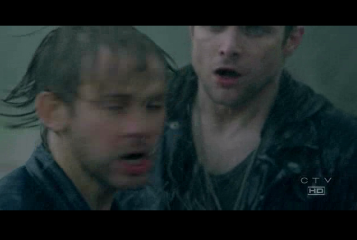
We're gonna go from:
This - 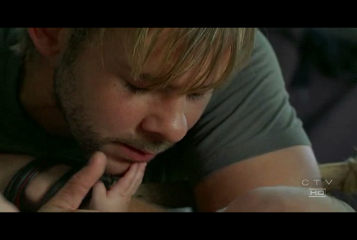 to this - to this - 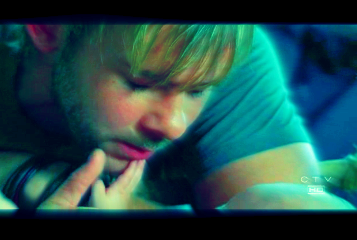
We'll get there in 6-7 steps, depending on the scene:
1. Light Rays
2. Saturation
3. Brightness/Contrast
4. Color Balance
5. Curves
6. Saturation (Yes, again)
7. Color Balance (Yes, again, but only for corrections.)
Pictures and explanations soon!
Random Tip #1: Order MATTERS! If you have any number of layers over your clip/track, order can make a difference (sometimes HUGE) in how it shows up. Don't think it doesn't matter, because it does! |
|
| Back to top |
|
 |
SuperKC
Expert Vidder
Joined: 24 Feb 2005
Posts: 3667
Location: On a Stick
|
| Posted: Mon Jun 11, 2007 5:20 am Post subject: |
|
|
Random Tip #2: What are the three most important colorization tools that I use in Vegas?
- Saturation
- Color Balance
- Curves
(I'd add Contrast/Brightness to that list as well, especially if you're gonna go for black & white, or are working with overly dark/overly light caps.) |
|
| Back to top |
|
|
SuperKC
Expert Vidder
Joined: 24 Feb 2005
Posts: 3667
Location: On a Stick
|
| Posted: Mon Jun 11, 2007 5:21 am Post subject: |
|
|
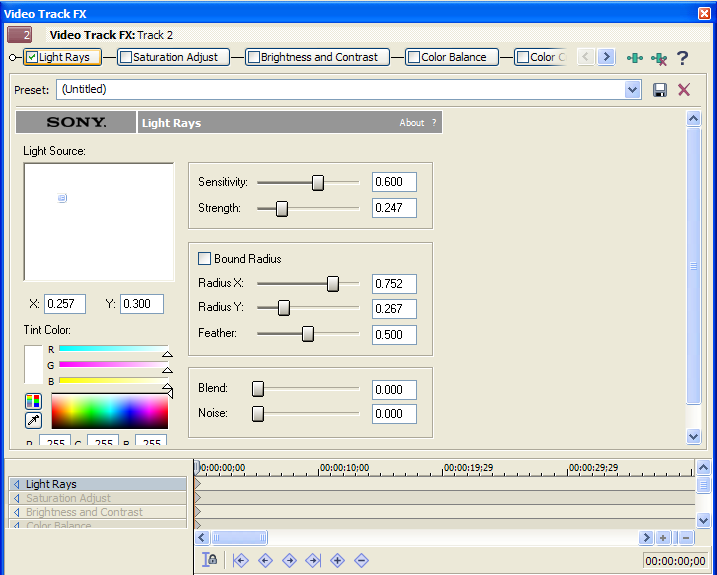
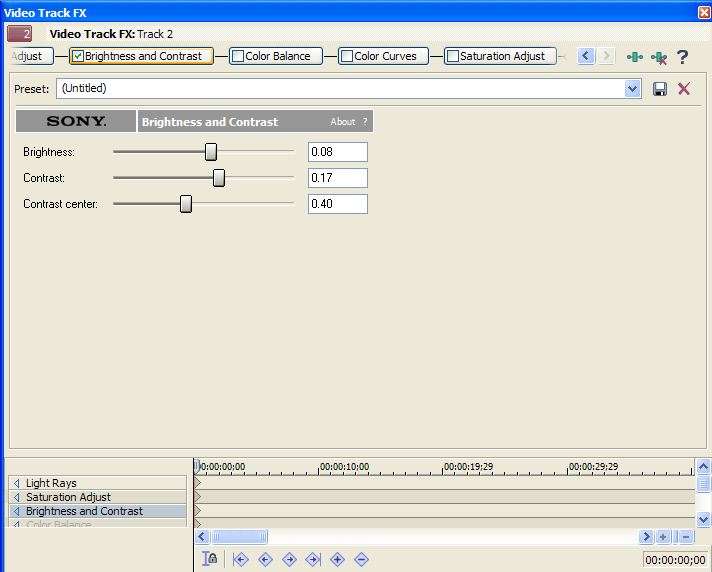
STEP 1: Light Rays
I wanted the video to have a bit of an overall "dreamy" or "watery" look. Kind of like blurred vision when looking through wet goggles. If that makes sense. So I decided to add some light rays. This effect isn't actually a colorization effect, but I did say I was gonna show you exactly how I achieved that look.
THE SPECS:
Blah blah blah, moved the focal point. Blah blah blah, upped the whosawhatsits, blah blah blah, lowered the whatsawhosits.
THE RESULT:
From this - to this - 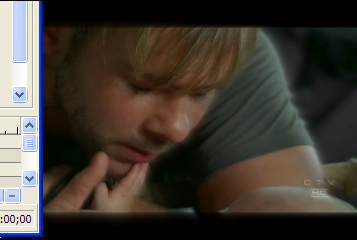
At this point. It just makes it a bit murky. Wait. Murky? Watery? ZING!
STEP TWO: SATURATION (Full blast!)
Could we get some color up in here?
THE SPECS:
I like to live life on the edge! Why not just up everything to the max? LETS DO IT!
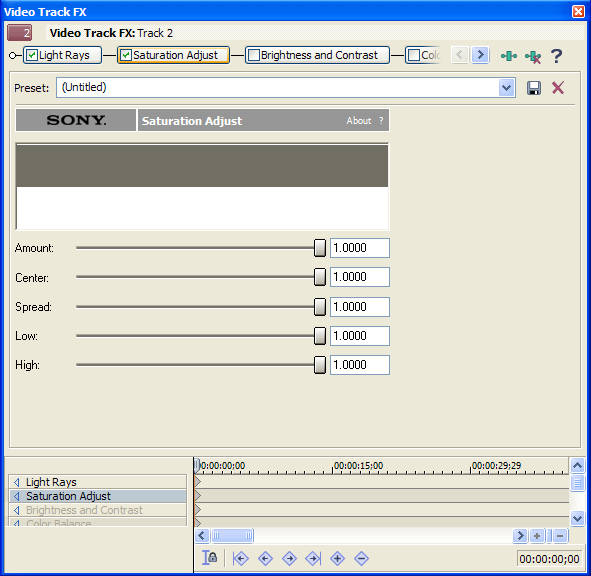
THE RESULT:
From this - to this - 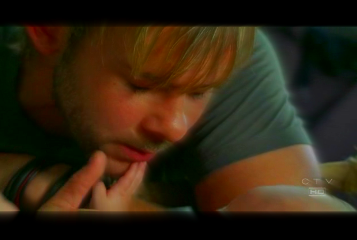
Yowza! It's an oompa loompa! (No hobbit jokes intended! And he's not THAT orange anyway.) |
|
| Back to top |
|
|
SuperKC
Expert Vidder
Joined: 24 Feb 2005
Posts: 3667
Location: On a Stick
|
| Posted: Mon Jun 11, 2007 5:21 am Post subject: |
|
|
STEP THREE: Brightness and Contrast
I know that later, I'm going to be adding a few more harsh color changes, and he's looking a bit dark, so let's shed some light on the situation right now.
THE SPECS:
A little brightness, a little more contrast.
THE RESULTS:
From this - to this - 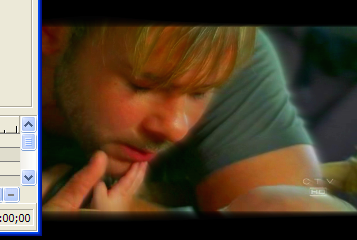
Yeah, it's kind of lackluster. I know!
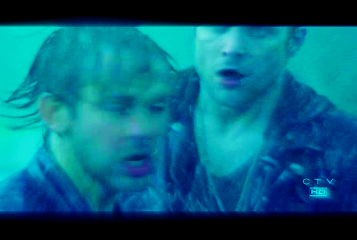
STEP FOUR: Color Balance
What happened to my watery theme? What happened to my retina's not being burned every time I look at Charlie's face? Let's take out some of that RED/YELLOW/ORANGE and add some stinkin' blue!
THE SPECS:
Minus a LOT of red. Plus a bit of green and a BUNCH of blue! (These are all technical terms you know?
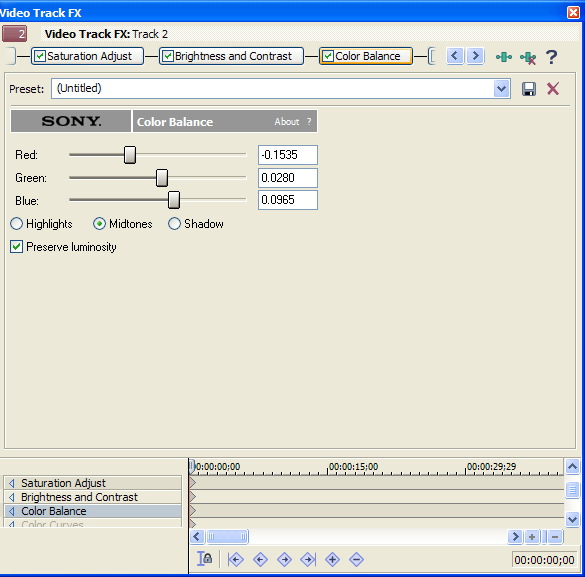
THE RESULTS:
From this - to this - 
Holy moly! That did a lot! Do you see why Color Balance is one of my favorite tools? |
|
| Back to top |
|
|
SuperKC
Expert Vidder
Joined: 24 Feb 2005
Posts: 3667
Location: On a Stick
|
| Posted: Mon Jun 11, 2007 5:22 am Post subject: |
|
|
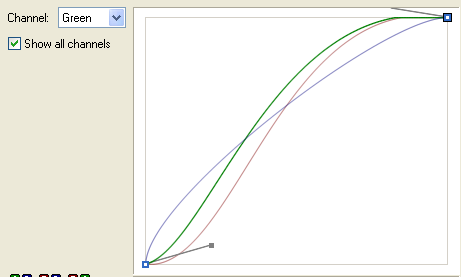
STEP FIVE: Curves
aka - the hard one!
THE SPECS:
I rarely use anything but the RGB channels here. Here's an overall look at these.
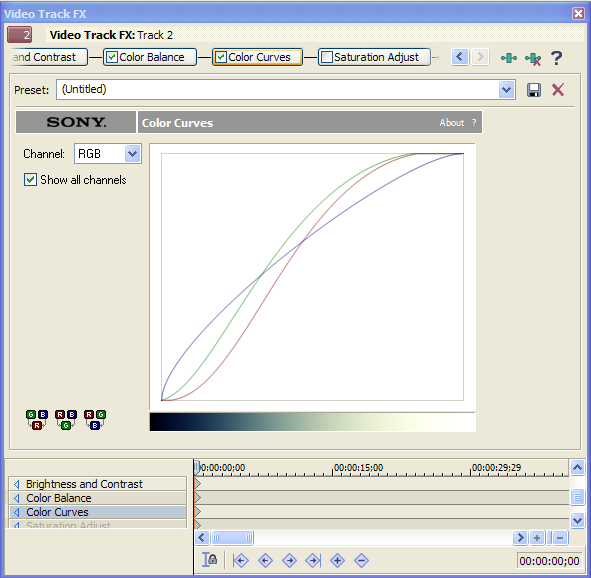
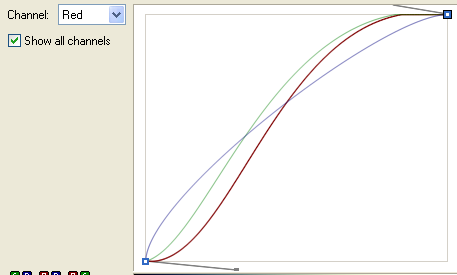
Now let's take a look at the individual color lines. These can be dragged up and down, made longer or shorter, etc. in order to control the shape of the curve.
RED:
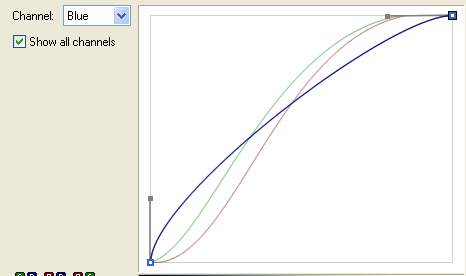
BLUE:
GREEN:
THE RESULTS:
From this - - to this 
| Quote: |
SIDEBAR: (Proceed to the next step if stopping in the middle confuses you!)
Now, you may be saying to yourself, "Well, gee, that's what curves does? That didn't seem to do much!" On the contrary. I had done a lot of stuff to this clip previously, so the curves only enhanced what I'd already done. But curves alone CAN produce dramatic results. This is not the best setting for that, but here's an example of what this exact curves setting can do to the clip without ANY OTHER colorization technique.
FROM THIS - to this - 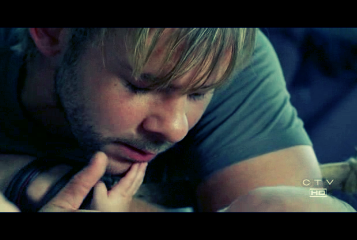
Let's take that one step further, and add the saturation layer from step # 2.
From this - to this - 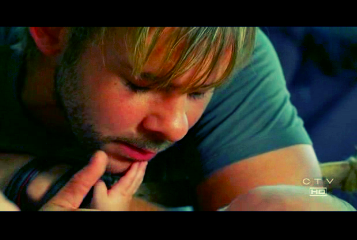
I think this is a vast improvement over the exact same Saturation layer without the curves as seen here:
|
|
|
| Back to top |
|
|
SuperKC
Expert Vidder
Joined: 24 Feb 2005
Posts: 3667
Location: On a Stick
|
| Posted: Mon Jun 11, 2007 5:22 am Post subject: |
|
|
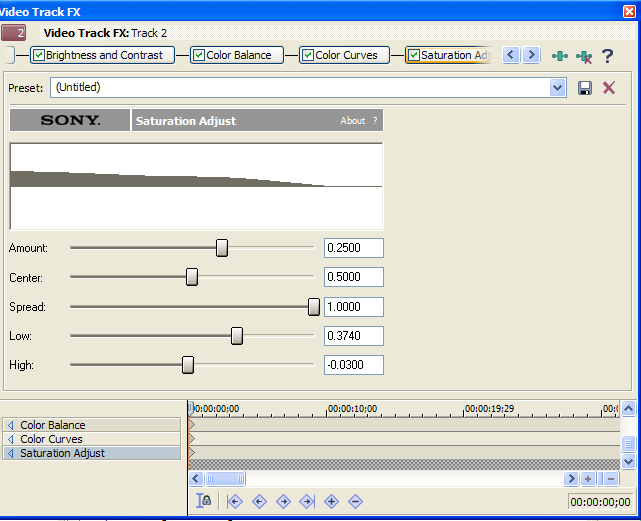
STEP SIX: Saturation #2
Yah, okay. You get it. I like color. Geez!
THE SPECS:
Still a bit too grim for me. After putting in all that blue and washing him out a bit. I want to up the saturation, but not too much. So this is vastly different than the last saturation step.
THE RESULTS:
From this - to this -
And that's it! (Sorta.)
There's one more step! But that's only when dealing with "special" scenes. I'll explain more below.
But for now. Let us bask in our cleverness!
| Quote: | BEFORE: AFTER:
OR
BEFORE: AFTER: |
|
|
| Back to top |
|
|
SuperKC
Expert Vidder
Joined: 24 Feb 2005
Posts: 3667
Location: On a Stick
|
| Posted: Mon Jun 11, 2007 5:23 am Post subject: |
|
|
HOLY CRAP WHAT WAS THAT?
That was a murky scene! What happens when you put a bunch of color over a murky somewhat greyish scene? Well. It absorbs it of course!!!!!!!!!!!!
OH GEEZ! That is NOT what we want at all!
What do we do!??!?!?!?
Well... remember back in step 4 when we took out all the red and added all the blue? Well, we can sorta kinda... reverse that! YAYYYY! How?
There are two ways. One way would be to go back to that layer and change the specs. But in this case, I used a track effect, so those layers are over my entire track. So the way I did it, was I added an additional effect on the clip itself. Good old color balance!
COLOR BALANCE: Additional Step
GIVE ME RED!
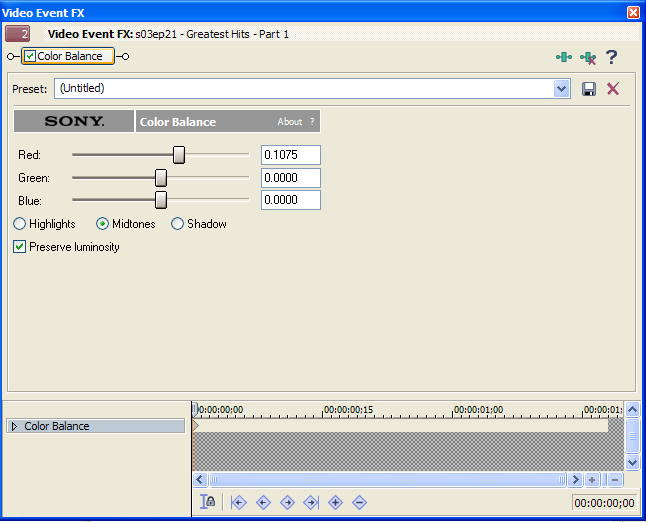
And how does it look?
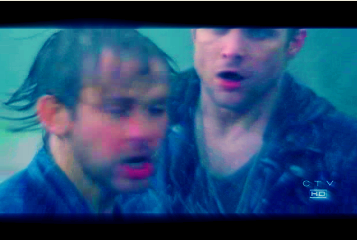
Sweeeeeeeeeeeeeeeet.
Okay I'm done. Shoot me now. |
|
| Back to top |
|
|
SuperKC
Expert Vidder
Joined: 24 Feb 2005
Posts: 3667
Location: On a Stick
|
| Posted: Mon Jun 11, 2007 5:23 am Post subject: |
|
|
| RANDOM TIP #3: Clearly, a crapload of color layers DOES seem to alter the clarity a bit. This example is a little bit more enhanced in that factor because I used the light rays. Without the light rays the clarity is much better, but still is lost a bit in all of the layers. So take note! Brightness/Contrast, Curves, Saturation, etc. CAN BE YOUR ENEMY! |
|
| Back to top |
|
|
SuperKC
Expert Vidder
Joined: 24 Feb 2005
Posts: 3667
Location: On a Stick
|
| Posted: Mon Jul 16, 2007 3:52 am Post subject: |
|
|
| If you use this tutorial. I'd love to see your results. So let me know if you post a vid where you used it to help you with your coloring. Fruit of the labors and all. |
|
| Back to top |
|
|
Fan4Lost
Advanced Vidder

Joined: 12 Jan 2006
Posts: 2224
|
| Posted: Mon Jul 16, 2007 1:34 pm Post subject: |
|
|
 You did one! And one for the coloring!!!! YOU ROCK! I'll give a try and post my results. You did one! And one for the coloring!!!! YOU ROCK! I'll give a try and post my results.  |
|
| Back to top |
|
|
Aislynn
Council Member
Joined: 03 Feb 2005
Posts: 35782
Location: Sawyerville, USA
|
| Posted: Mon Jul 16, 2007 7:42 pm Post subject: |
|
|
Ooo, I love to look at this tutorial just to see the pretty pics!  Anyway, I should've posted to say thanks for this tut last month when I did "Runaway Train" because I used it to give a "boost" to the colored sections that peeked through the black and white so they'd pop a bit better! Thanks so much for posting this! Anyway, I should've posted to say thanks for this tut last month when I did "Runaway Train" because I used it to give a "boost" to the colored sections that peeked through the black and white so they'd pop a bit better! Thanks so much for posting this! |
|
| Back to top |
|
|
SuperKC
Expert Vidder
Joined: 24 Feb 2005
Posts: 3667
Location: On a Stick
|
| Posted: Tue Jul 17, 2007 5:25 am Post subject: |
|
|
| Really!?!? Oh cool! I just thought nobody had used it! I'm glad it was useful! |
|
| Back to top |
|
|
wolffootball37
Expert Vidder

Joined: 07 Jan 2007
Posts: 4210
Location: Plano, Texas
|
| Posted: Thu Jul 19, 2007 5:31 am Post subject: |
|
|
Thanks sooo much for posting this KC!!! Its sooo helpfull!!!  |
|
| Back to top |
|
|
mystique
Joined: 11 Apr 2007
Posts: 11
|
| Posted: Fri Jul 27, 2007 2:51 am Post subject: |
|
|
KC you mentioned about using a track effect, does it mean what I think you meant? That there's a way where you can use a setting that you like over an entire video without doing it individually? How can you do that?
BTW thanks for this tutorial, its been really helpful. |
|
| Back to top |
|
|
SuperKC
Expert Vidder
Joined: 24 Feb 2005
Posts: 3667
Location: On a Stick
|
| Posted: Sun Aug 26, 2007 4:01 pm Post subject: |
|
|
Oh yeah sorry I didn't see this question sooner. I have used this so much you think I should know the answer by heart, but it's more of a sense memory thing. LOL. I just know where the buttons ARE lol. Kind of like a phone number! So I gotta open up vegas to tell you.
There are two ways:
01: Make sure your track is selected, and then go to: Tools > Video > Video Track Effects
02: The shortcut is just to click the little icon to the left of your track. The best way I can describe it is to say that it looks like a little door with one handle on each side. You just click that and it gets your right to the track effects. |
|
| Back to top |
|
|
|

